Text-to-SQL
Use Case Overview
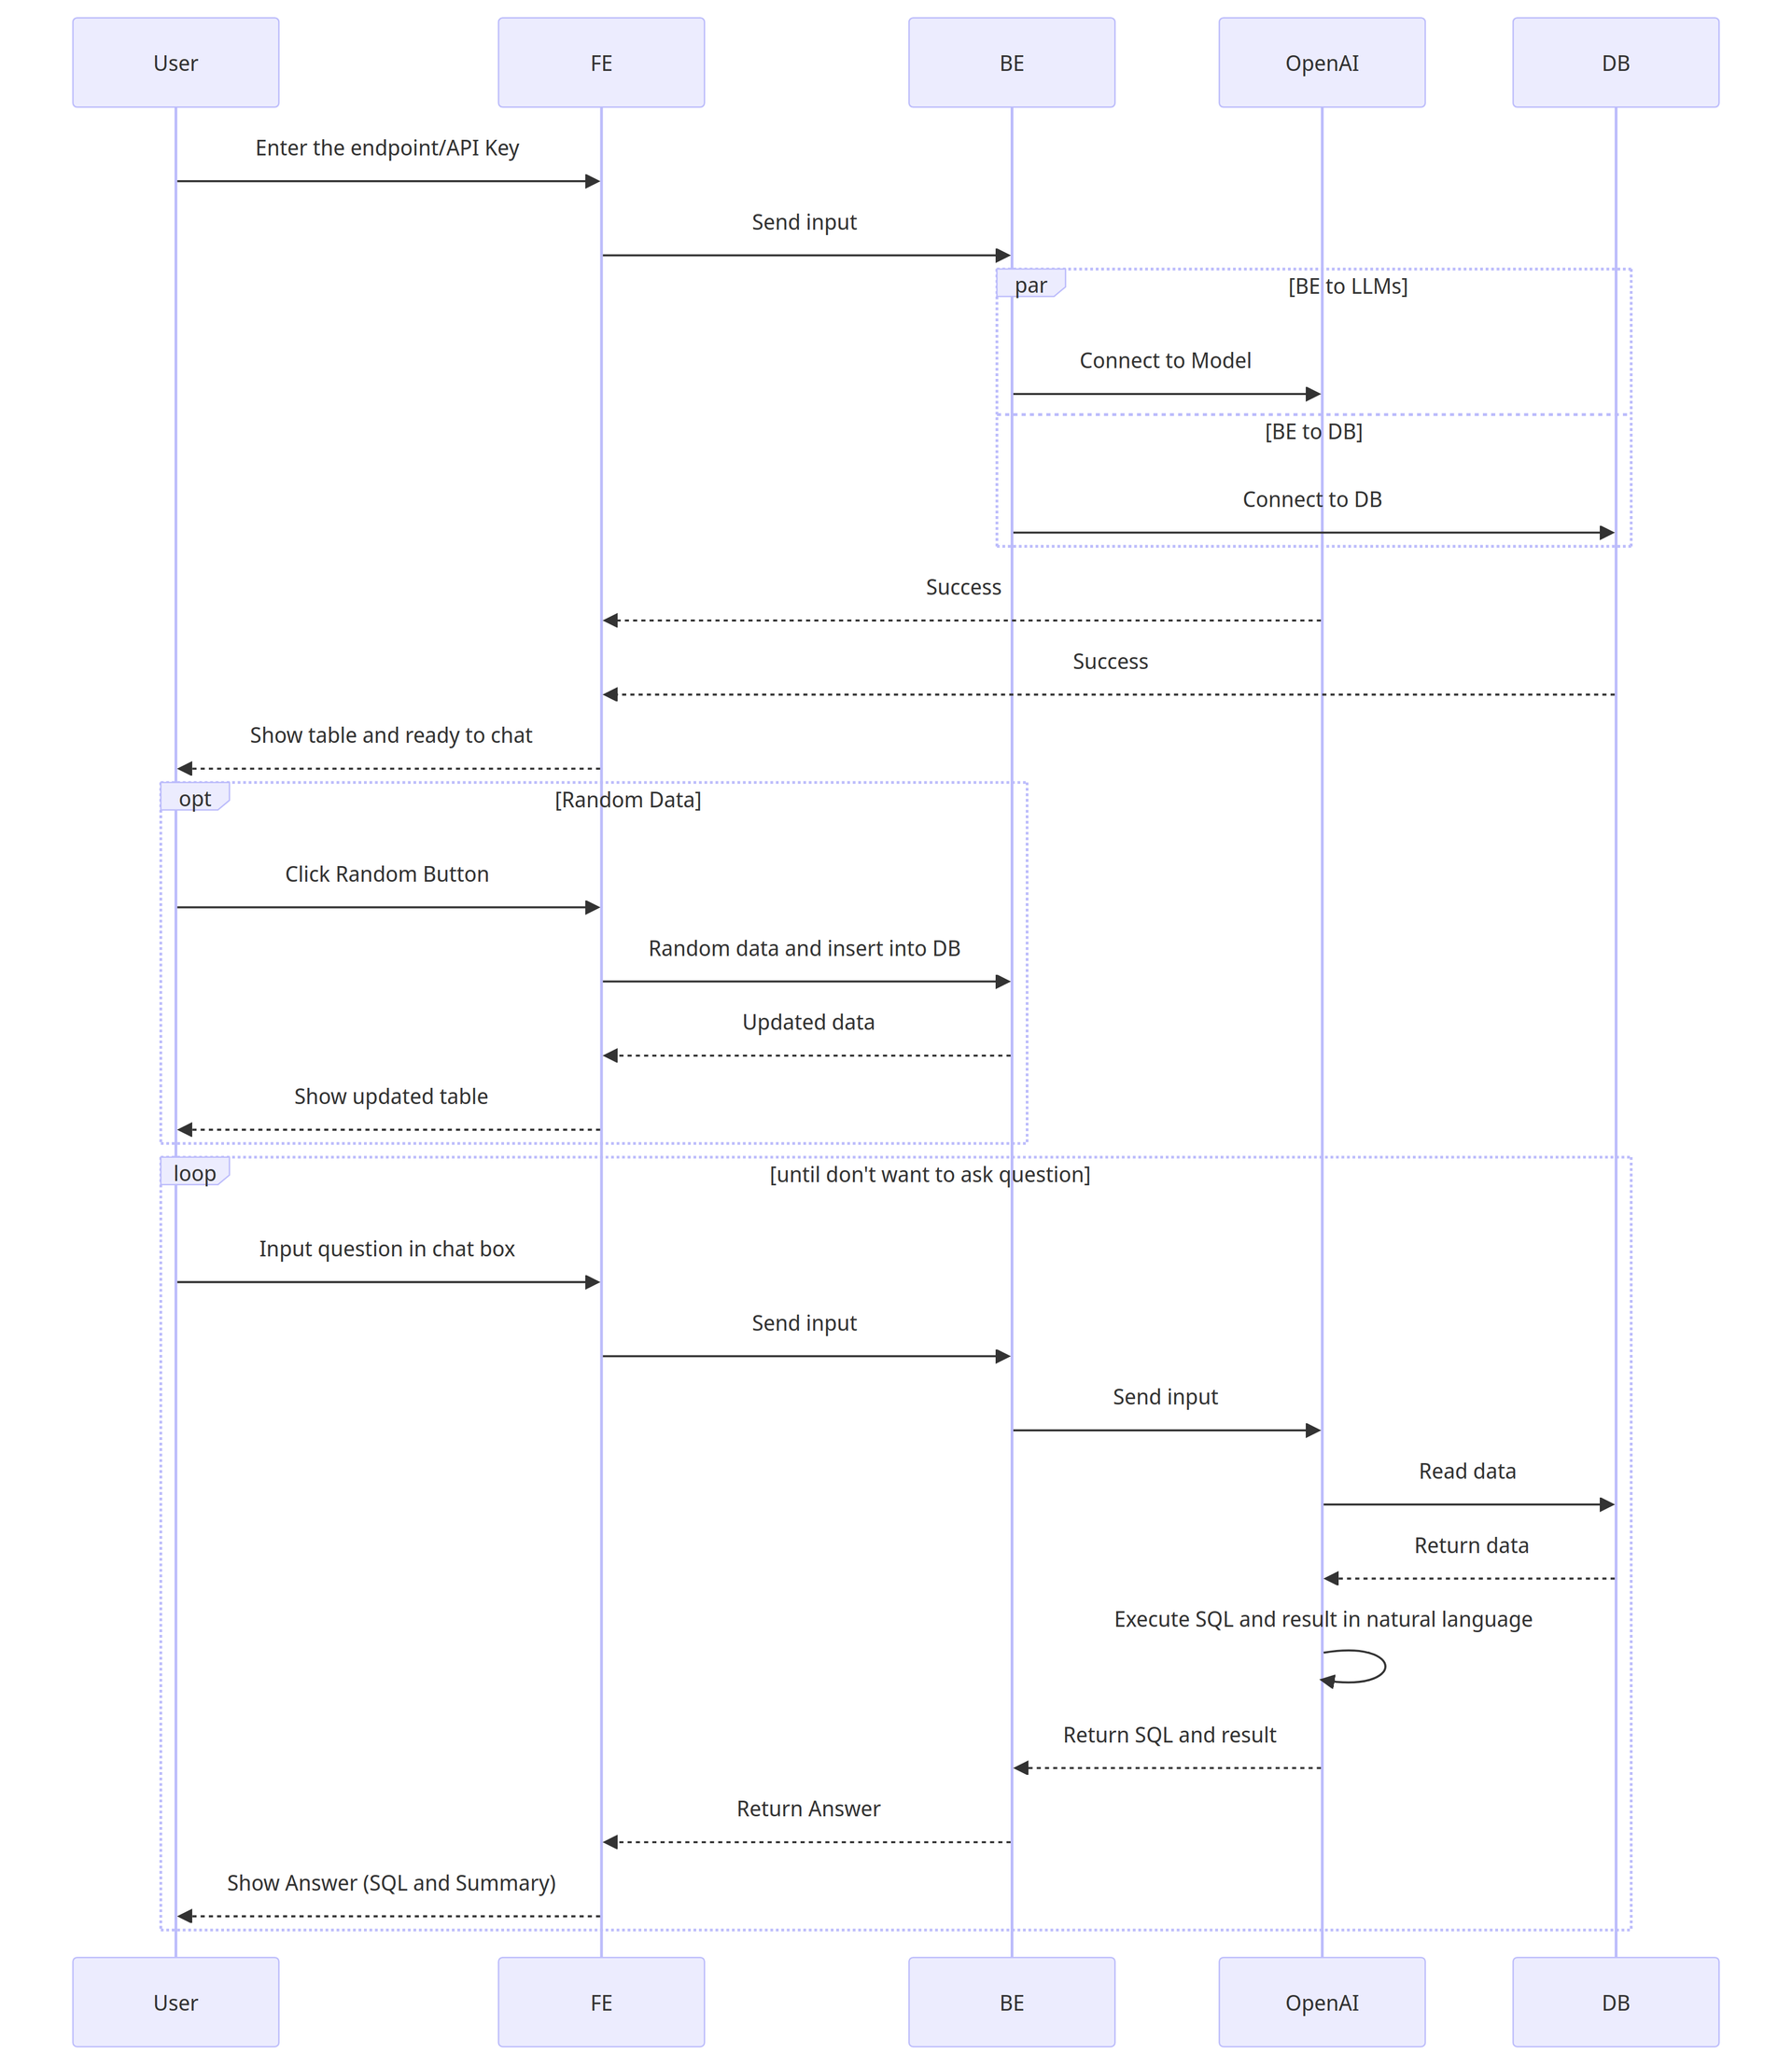
The Text-to-SQL Chatbot is designed for Business Analysts (BA) or Product Managers (PM) who need to query a PostgreSQL database without expertise in SQL. The frontend provides a user-friendly interface, allowing users to input queries in natural language and receive corresponding SQL queries and database results.

User Flow
Connect to Database:
Users paste the Backend (BE) endpoint connected to the PostgreSQL database.
After clicking connect, the website displays the database schema and data.
Write Queries:
Users type prompts or questions into the chat.
The website responds with the corresponding SQL queries, displaying them in the chat.

Frontend Development
Frontend Development with Next.js
The frontend is implemented using Next.js, with key libraries including react-hook-form, @tanstack/react-query, Tailwind CSS, and zod for schema validation.
create project
Form by zod
react-hook-form
The integration involves connecting to the backend API using axios and @tanstack/react-query. Data, including column information and random data for the table, is fetched from the backend, and the UI is updated accordingly.
Deploying the Frontend
To deploy the frontend, configure environment variables such as the API endpoint in the .env file. The tutorial provides guidance on deploying using Next.js.
Backend Development
Setting up AWS EC2 Instance
This section guides you through setting up an AWS EC2 instance for database and backend API installation. The recommended EC2 type is one with sufficient RAM, such as m5.large, c5.large, or r5.large, along with a minimum of 50GB storage. The chosen operating system is Ubuntu.
Installing and Configuring PostgreSQL on EC2
The tutorial suggests using Docker for easy installation of PostgreSQL. It provides step-by-step commands for installing Docker on the EC2 instance and running a PostgreSQL container.
install Postgres by Docker
Setting up FastAPI Backend
Initial FastAPI
FastAPI is chosen for creating the backend API. The tutorial introduces the basic structure of a FastAPI project and demonstrates enabling CORS for frontend communication.
We will use FastAPI to create an API. Llamaindex serves as the intermediary for handling data models and the LLM model, which is GPT-4. Therefore, it is necessary to create an API key for OpenAI before using it, which can be done at https://platform.openai.com/.
necessary python library for FastAPI
create app.py and initial FastAPI
Initial PostgreSQL Connection
The backend connects to PostgreSQL using SQLAlchemy and psycopg2. Environment variables are loaded using python-dotenv, and key parameters for connecting to the database are declared.
Install necessary libraries using pip
Declare parameters for creating a database connection, pulling data from environment variables
Use the provided GitHub example to set up an API for preparing tables and data related to student information, including height and weight.
The GitHub example includes the following API endpoints:
/createTable: Create the student table./getInfo: Check information about the table./addRandomData: Add sample data to the table./getAllData: Retrieve all data from the table.
Optionally, the example includes an endpoint for removing the created table:
/removeTable: Delete the table created.
Integrating LlamaIndex and OpenAI
LlamaIndex is used for data modeling, acting as an intermediary between the database and the LLM (GenerativeAI) model. The tutorial covers the installation of LlamaIndex and the setup of OpenAI API keys.
Install Llamaindex Library
Declare OpenAI API Key as Environment Variable
Deploying and Testing the Backend
The backend server is deployed, and testing is performed using various API endpoints. The tutorial shows how to create tables, add random data, and query with prompts to retrieve results from the database.
Deployment Steps:
Create a Screen Session
Navigate to the API Folder
Start FastAPI
Detach from Screen Session
Testing Endpoints:
Test
/createTableEndpoint:Response:
Test
/addRandomDataEndpoint:Response:
Test
/queryWithPromptEndpoint:Prompt:
Response:
Setting up AWS API Gateway
The final section demonstrates integrating the deployed API with AWS API Gateway for enhanced management capabilities, such as authentication. For more information: Link
Last updated