OpenAI with Rate Limit
Use Case Overview
we will refer to the basics demonstrated in the demo created by Vulture Prime. It is a website to generate API keys for users who want to connect to Vulture Prime's OpenAI. Users can generate API keys through the website automatically without the need for admin approval. Users can also choose the desired rate limit per day.
Note: In cases where there is a user dashboard, users need to log in before using the system.

User Flow
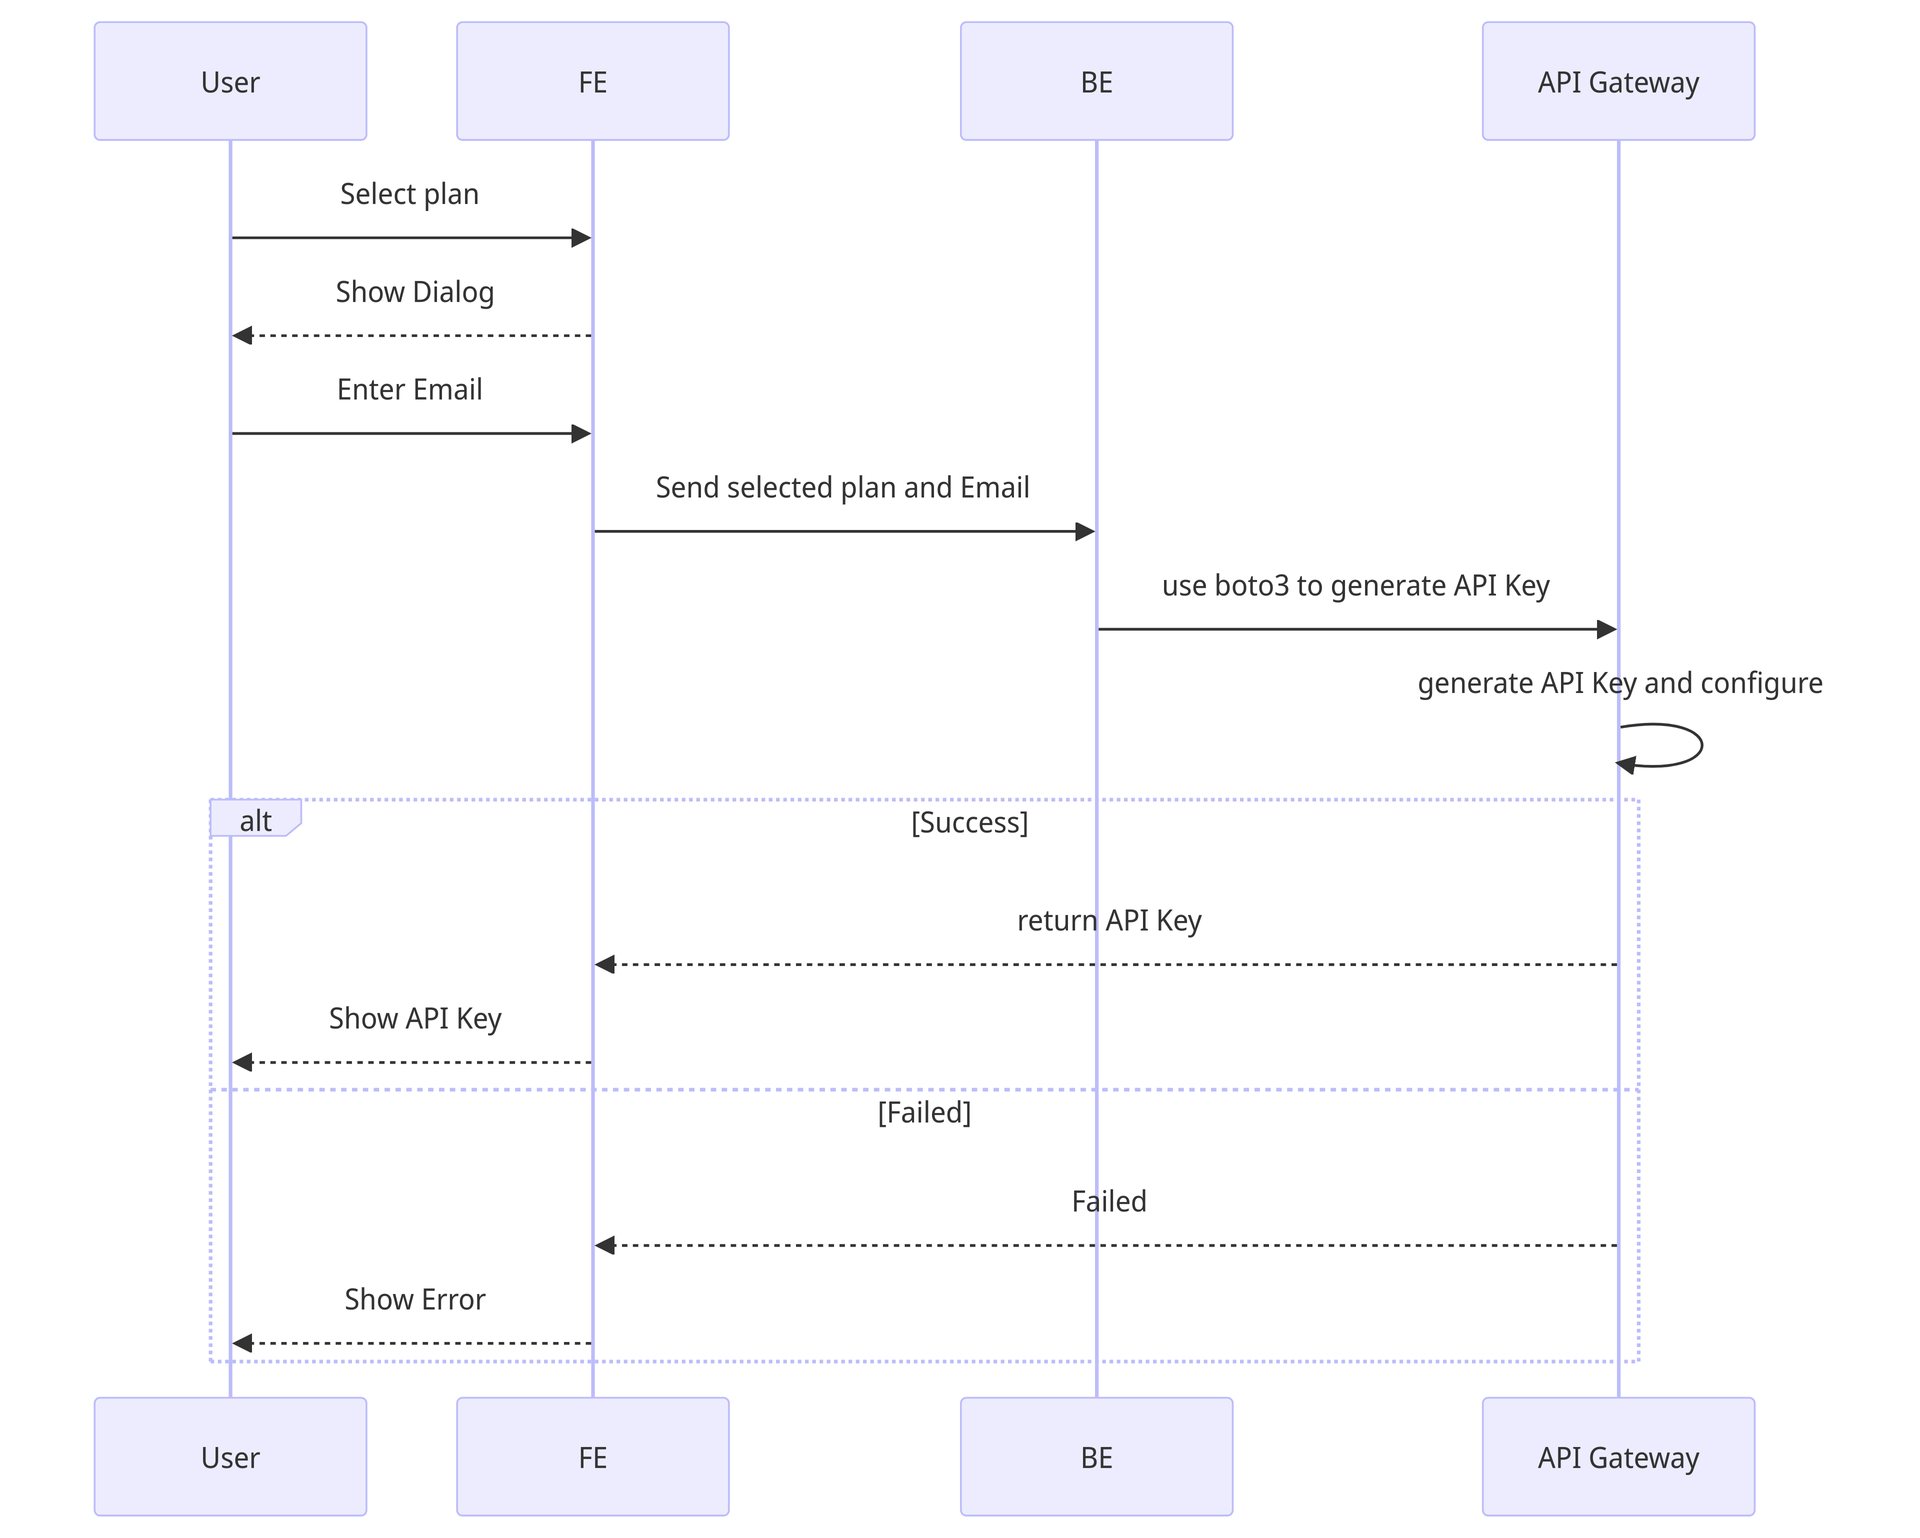
To facilitate management, we have created a UI page that allows users to access the API key easily without contacting the admin. Users can obtain the OpenAI API key by simply clicking a few times on the website. They can select the desired rate limit per day.

Frontend Development
Implement the Chat interface
In the process of creating the UI, we chose libraries and frameworks as follows:
Next.js: Start a new project using the command:
npx create-next-app my-project.
React Hook Form: Install with:
yarn add react-hook-form @hookform/resolvers zod. We use Zod for input form validation.
TanStack Query: Install TanStack Query (React Query) in the project:
yarn add react-query.
Connect the frontend with the backend
Now, we will implement the Chat Interface with a Streamed Text approach to receive real-time text data from the API and display it.
This code snippet fetches data from the API using the Streamed Text approach, allowing real-time updates of chat messages.
Implementing API key generation
After setting up the UI interface, we connect it to the backend for API key generation.
After obtaining the API key, we use it in other projects by adding the header:
Implementing rate limit notification
We handle input validation errors and errors from API usage in the Stream. When the API usage exceeds the limit, the API will return a status code of 429. In this case, we set an error message to notify the user.
This ensures that the UI displays an error message when the user exceeds the API usage limit.
Backend Development
Configuring Usage Plans
Begin by creating the usage plans that you want. Create three plans: 10RequestPerDay, 20RequestPerDay, and 30RequestPerDay. Map these plans to the API Gateway you created, indicating which plans should be used by which API Gateway.
Configuring API Gateway to Use API Key
Configure each method in API Gateway to require an API key. Edit the method request in the desired resource and check the "API Key required" option.
Setting up FastAPI Backend
Install the necessary Python libraries for FastAPI:
Create a file named app.py and initialize the FastAPI application:
This code initializes a FastAPI project, enables CORS for frontend communication, and sets up a simple endpoint. Run the server using:
Connecting to AWS with boto3
Use the boto3 library to interact with AWS services. Make sure that the EC2 instance has sufficient permissions for the intended actions.
Create a boto3 client for API Gateway:
API Design and Deployment
Design
Create two API endpoints:
To view available usage plans:
To create an API key and associate it with a usage plan:
This endpoint creates an API key, associates it with the specified usage plan, and returns the generated API key.
Deploy
Use the uvicorn command to run the FastAPI server:
This command runs the server on port 8000.
Testing API Calls with API Key
To test API calls with an API key through AWS API Gateway, include the key in the header as x-api-key:
This key will be read by API Gateway and sent to the backend, which you configured earlier.
Last updated